|
COLOR ME YELLOW OR ORANGE?
By Off Shore Tackle Staff
For over three decades the Off Shore Tackle sunburst has
stood for quality fishing tackle. When the now wildly popular
OR12 Side-Planer was introduced a few years ago, what other
color would it be than yellow? Last year the introduction
of the OR31 SST planer board changed the color blindness
of open water trollers. Now in-line planer board fishing
can go yellow or orange. Call it angler's choice!
Designed for two different trolling niches, the OR12 Side
Planer and the OR31 Side Planer SST are essentially the
same in-line boards, but rigged differently for different
species and fishing conditions. These factory rigged options
make it easy for anglers to choose the board that's right
for the kinds of fishing they do most.
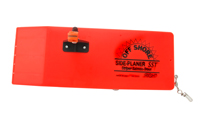
THE OR12 SIDE PLANER

The OR12 is the perfect in-line planer board for trolling
up walleye. Not only is this board the overwhelming choice
of professional tournament anglers, the OR12 has found it's
way into more fishing boats than any other planer on the
market. The FLW tournament circuit recently rated the OR12
as their top choice among in-line planers and we agree.
The sight of these little yellow boards bobbing around
in the water has become so common, one might wonder why
confuse things by introducing a second board in a different
color?
The answer is simple. The OR12 comes rigged for walleye
fishing with two OR14 releases mounted on the tow arm of
the board and at the back. When the fishing line is secured
into both the front and back releases, the board is pinned
in place and can't slide or pop off the line.
Keeping the board fixed on the line is a rigging option
that is favored by most walleye trollers. Rigged in this
fashion, the OR12 not only deploys lures out to the side
of the boat, it doubles as a strike indicator.
When a fish is hooked, the OR12 gets dragged backwards
in the water, making it easy to tell when a fish has been
hooked. At this point the angler reels in both the board
and the fish together. When the board is within reach of
the boat, it's removed and the fish is fought to net. It's
that simple.
For fishing in waters known for small fish, I recommend
adding the popular Tattle Flag Kit (OR12TF) to your Side-Planer.
This after market kit comes complete with a pair of OR16
Snap Weight Clips, linkage arm, spring and the necessary
hardware to complete the installation. It takes about five
minutes to install a Tattle Flag on an OR12 Side-Planer.
The time it saves anglers and the fish it accounts for are
invaluable.
Once in place, the strike indicating ability of the board
is vastly enhanced. Even a little perch that gets accidentally
hooked will be signaled by the spring loaded flag folding
down. This highly useful accessory allows trollers to tell
without question every time one of their lines has hooked
a small fish, weed or another piece of debris in the water.
The value of the Tattle Flag can't be underestimated. Anytime
anglers are trolling in waters plagued with small fish or
floating vegetation, the Tattle Flag is a must. Also, for
fishing live bait rigs the Tattle Flag signals the presence
of bait stealing fish like perch or drum that could otherwise
spoil a day on the water.
THE OR31 SIDE PLANER SST
For years we recommended a specific rigging of the OR12
for trout and salmon fishing called the release and slide
method. Because anglers after trout, salmon and steelhead
tend to run multiple lines per side of the boat, it's critical
that the in-line board be rigged to release and slide down
the line at the strike. To accomplish this requires a special
line release on the tow arm of the board and a snap swivel
or corkscrew swivel mounted to the rear of the board.
Now anglers don't have to worry about rigging their in-line
planers for salmon, striper, and trout. They can simply
purchase the SST board that comes in the package rigged
and ready for action.
On the tow arm an OR19 (orange) line release has the correct
tension for trolling at high speed and in rough water. At
the back of the board a corkscrew swivel allows the fishing
line to quickly be looped into the swivel. In addition,
a few feet in front of the lure, a Speed Bead (OR29) is
threaded onto the fishing line to stop the board from hitting
the fish.
When a fish is hooked, the line can be triggered free from
the tow arm release by simply snapping the rod tip. Once
the release is popped, the board slides down the line to
the speed bead. This allows the board to swing to the back
of the boat and away from other planer lines.
This rigging method is the preferred way of fishing for
browns, kings, coho, steelhead, lake trout and striper when
these fish are found feeding near the surface.
So why is the SST board orange? In part the orange color
is to keep from confusing customers who are familiar with
the OR12 board. Also, the bright orange color shows up well
on the water, helping anglers keep tabs on all those boards
bobbing around in the water!
The good news is anglers can choose from either the OR12
for walleye fishing or the OR31 SST for big game species.
Both boards function flawlessly for their intended purpose.
All Off Shore Tackle Company LLC in-line board accessories
can be used with either the OR12 or OR31. A set or two of
these boards may well be the best investment any open water
troller can make.
SPECIAL TIP
The OR19 release that comes standard with the SST board
features a very strong spring tension. For the best results,
we recommend taking the fishing line and folding it over
an index finger. Next spin your finger a few times to form
several wraps in the fishing line. Pinch the wraps between
the thumb and forefinger of your other hand and put these
wraps between the jaws of the OR19 release. This simple
rigging trick allows the line to be popped free from the
board much easier than if a single length of line is placed
in the release.
Also, remember that this line release and most others function
best when used with quality monofilament line.
These days it's color me yellow for walleye or color me
orange for trout, salmon and striper. Either way these products
are winners and guaranteed to put more fish in the boat.
Now there is no need to be color blind when you're trolling.
<Back to Top
A CRASH COURSE IN PLANER BOARD LINE RELEASES
By Bruce DeShano
The invention of the dual planer board revolutionized open
water trolling. Not only do planer boards reach out away
from boat noise, the ability to fish multiple lines and
lures makes this popular form of trolling literally one
of the most efficient ways of catching fish short of using
a gill net! No species is safe from planer board trolling
tactics. Walleye, trout, steelhead, salmon, striper, pike,
muskie and a wealth of salt water species are fall victim
to the powers of planer board fishing.
All dual board planer systems function the same. The planer
board itself is attached to a tether line made from either
heavy nylon weed whipper line or strong braided nylon cord.
This tether line is stored on a set of wheels mounted either
to the hard top of the boat or a mast system that is in
turn mounted near the bow.
When the board is dropped in the water and line played
out, the planer works its way out to the side of the boat.
Once the board is positioned the desired distance out to
the side, individual fishing lines are deployed by attaching
a line release to the tether line and then clipping the
monofilament into this line release. Again, as line is played
off the fishing reel, the line release slips down the tether
line and out towards the board.
By simply staggering lines with a little space between,
up to six lines per side of the boat can be fish with a
dual board system. The power of eight, 10 or even 12 lines
fishing a variety of water depths is a powerful fish catching
system that can't be matched by any other trolling tactic.
Planer board fishing is a beautiful thing, but the weakest
link in the whole planer board program boils down to the
method used to attach the fishing line to the tether line.
Known simply as line releases, the fishing tackle market
is flooded with various types of commercially produced line
releases. A number of anglers also make their own crude
releases from various materials.
Over the years I've seen just about everything imaginable
used as a planer board release. From office rubber bands
to alligator clips fitted with shrink tubing the problem
with "home made" releases and many commercially
produced products is they don't take one important part
of planer board fishing into consideration.
The key to making a planer board system work is to have
a line release that provides the correct amount of tension
or grip on the fishing line. If the release loses its grip
too easily, fish that strike will not be hooked solidly
and likely escape. If the release is stubborn and won't
relinquish it's grip, hooked fish are dragged along and
the risk of breaking the line becomes a real threat to fishing
success.
Developing a planer board release with that "just
right" amount of tension is hardly a simple task. A
complicated mixture of tension, line diameter and pad grip
must be taken into consideration. Not only does the release
tension have to be perfect for the particular line diameter
being used, the pads must hold the line without causing
abrasion that can lead to broken lines and lost fish.
Off Shore Tackle manufactures the widest assortment of
planer board style line releases on the market. The reason
so many different releases have been developed and marketed
is because no single release can handle every planer board
trolling application. The releases suitable for trolling
up eating sized walleye are vastly different than those
needed to hook and land monster muskies. One of the easiest
ways to understand line releases is to organize them by
species.
WALLEYE
Walleye are one of the most popular species targeted with
planer boards. Places like Lake Erie, Saginaw Bay, Little
Bay de Noc, the Bay of Quinte, Lake Winnebago, Lake Mille
Lacs and many other world class walleye fisheries have been
the proving grounds for planer board trolling tactics.
Depending upon the average size of the fish being targeted,
one of several line releases is ideal for open water planer
board trolling. The classics OR10 (yellow) is the lightest
tension release in the Off Shore Tackle line up. Designed
to hook small (eating sized) walleye and then easily release,
the OR10 features two tension settings. When the spring
is slid into the forward position the tension is increased.
By simply sliding the spring backward in the housing, the
tension is reduced. This simple feature is one of the most
handy tools a planer board angler has.
When trolling for a little bigger walleye, the OR14 (black)
line release is an excellent choice. Similar to the OR10,
but with a medium release tension, the OR14 also has the
option of two tension settings.
The OR3 (white) is a larger downrigger style release fitted
with a shower curtain hook (quick clip). The increased surface
area of the pads, allow anglers to customize the desired
amount of tension by how deeply the line is placed in the
release. For a light tension, simply pinch the line near
the edge of the rubber pads. For a heavy tension, bury the
line to the back of the rubber pads.
Captains and serious anglers who troll big water and big
seas favor the OR3 because of the positive grip it affords.
In many cases hooked fish can't trip the OR3 and the angler
will be required to snap the rod tip to gain a crisp release.
This means of triggering the release comes in handy when
three or more fish are hooked at the same time. The last
thing you need are several fish popping line releases and
moving towards the back of the boat at the same time. The
OR3 allows the captain to release and fight the fish as
dictated by conditions.
BROWNS, STEELHEAD & SALMON
Bigger and more powerful fish are harder to hook. A line
release with more spring tension is required to insure the
fish gets enough resistance to drive the hooks home. Using
too light a tension release on big fish is asking for missed
fish.
The OR-19 (orange) is the same size as the OR10 and OR14,
but the spring tension is much stronger. This release also
features adjustable spring tension, making it a top choice
for everything from modest sized browns to bruiser kings.
Another top choice for salmon and trout fishing is the
OR17. This release features the medium tension OR1 downrigger
release fitted to a shower curtain hook (quick clip). The
ideal combination of pad size and tension this unique release
can be used in literally any situation from calm seas and
modest fish, to rough seas and the biggest king salmon.
The strongest line release in the Off Shore Tackle line
up is the OR30. Designed for salt water applications, muskie
trollers on Lake St. Clair swear by this release. The extra
strong spring tension allows large baits to be trolled at
maximum speeds. When a monster muskie or barracuda grabs
a hold of a lure attached to an OR30, he's about to get
the jolt of his life!
REPLACEMENT PADS
Over time, the pads used on line releases are going to
show some wear and tear. All Off Shore Tackle line releases
feature pads that can be replaced, adding to the value of
purchasing these products in the first place. By simply
(and carefully) using a knife blade or a straight screw
driver to pop out the old pads and replacing them, a release
that has provided years of trustworthy service is once again
ready to fish it's heart out.
SUMMING IT UP
Planer board trolling is a fish harvesting systems, but
when the line releases don't function properly this machine
breaks down. Quality line releases aren't cheap, but they
provide years of faithful service, hook the most fish and
in the end make fishing what it's supposed to be..... FUN!
Don't leave the dock without a good assortment of Off Shore
Tackle line releases.
<Back to Top
GETTING DOWN WITH DOWNRIGGER RELEASES
By Larry Hartwick
The trolling invention known as the downrigger has been
in active service now for nearly four decades! The ultimate
in depth control fishing, downriggers are most often associated
with trolling for Great Lakes trout and salmon, but the
truth is these trolling aids are just as useful for catching
striper, walleye, muskie, pike and a wealth of saltwater
species.
Like planer board fishing, downriggers require quality
line releases to function properly. Equip a downrigger costing
more than a grand with a line release worth pennies and
a recipe for disaster is created. Getting the most from
expensive downriggers requires using the best possible line
release systems.
Off Shore Tackle manufactures five different kinds of downrigger
style releases designed to match literally any kind of trolling
chores. For small to modest sized fish and normal trolling
speeds, the OR4 (white) Light Tension Downrigger Release
is ideal. Used most commonly for trolling walleye, coho
and brown trout, this versatile product is also ideal for
trolling striper/white bass hybrids and land locked trout
species. Designed to function best with lines from 10-25
pound test in diameter, the OR4 is a workhorse among downrigger
releases.
The same release used on the OR4 is also offered in a stacker
release called the OR7. Stacker releases allow two fishing
lines to be fished from a single downrigger. Stackers are
easy to use and they double up the effective powers of any
downrigger.
The OR1 was the original trolling product introduced by
Off Shore Tackle and continues to be a top seller more than
30 years down the road. This medium tension release is perfect
for trolling steelhead, kings, coho, lake trout and striper.
Designed to function best with 10-25 pound test line, the
OR1 is the best selling downrigger release of all time.
The OR2 is the stacker release version of the OR1. Again,
stackers are an invaluable trolling aid that allows multiple
lines to be fished with a single downrigger.
The heaviest tension downrigger release in the Off Shore
Tackle line up is the OR8. Designed for salt water applications,
this extra heavy spring tension release is designed to hook
the biggest and meanest species. In addition to salt water
trolling, muskie anglers swear by this extra heavy tension
downrigger release. Designed to function with monofilament
lines 20 pound test and larger, the OR8 can't be beat for
trolling at high speeds or for big game species.
Getting the most from downriggers boils down to using quality
line releases and stacker releases. Without these invaluable
accessories, those expensive downriggers won't function
properly. Get the job done right and invest in quality Off
Shore Tackle release aids.
<Back to Top
LEAD CORE TROLLING & BOARDS
By Gary Parsons & Keith Kavajecz
We've all heard the familiar saying, "Necessity is
the Mother of Invention". No where is that more true
than in fishing. It would be tough to argue that anglers
are among the most "inventive" folks around. If
something doesn't work quite the way you'd like it to, find
a solution and implement it. Anglers have been doing this
ever since man first tied a hook on a line. A good deal
of inventiveness has come when anglers combine two different
fishing applications in order to more efficiently catch
fish. Example: trolling in-line planer boards and trolling
with lead core line for open water walleye.
Now you might not think combining two such fishing presentations
would be any big deal; that is unless you've tried to run
lead core line on in-line boards. You can attach lead core
directly to an Off Shore Tackle OR12 Side Planer and it
will still plane to the side, but just not quite and efficiently
as it normally would. The added weight attached directly
to a board tends to cause it to tilt slightly and not plane
out as well as it should. It can be done however, and in
fact we do it with some regularity, but only in what could
be described as a "fact finding" phase of a day
on the water.
What we often do while prefishing for tournaments is run
reels fully spooled with lead core line (ten colors) and
attach the lead core directly to the boards while trying
to figure out how much lead core line we need to get our
baits to a desired depth to trigger bites. Once we figure
that out then we switch to what's called "segmented
lead core" which allows the boards to set perfectly
in the water and work to plane the lines out to the side
of the boat more effectively.
Segmenting lead core is a method of splicing sections of
lead core line in to your standard fishing line. Lead core
line, for those of you not that familiar with it, is basically
Dacron line with lead running through the center of it.
The outside sleeve of Dacron is color coded every thirty
feet, which is very helpful in setting out lines and determining
how much lead core to use for particular applications. The
most common size used in walleye trolling is 18# test.
All the weights higher than 18# have the same size of lead
insert, but sport heavier Dacron coatings. Therefore, 18#
has the thinnest diameter for the amount of lead used. A
key advantage to this is that you can get more of it spooled
on a reel, another is that it sinks the best with the least
amount of drag. This stuff is bulky by nature, and we recommend
using large capacity trolling reels for your lead core set-ups.
For segmenting lead core, the amount of lead core you splice
in depends on the depth you are trying to achieve with the
presentation. The general rule-of-thumb is that for every
color of lead core (30 foot section), you'll gain an extra
five feet of running depth at 2 miles per hour trolling
speed.
The basic set up for fishing segmented lead core goes like
this; First of all you will want to spool your reel with
a "backing". In most cases we'll use ten pound
test Berkley FireLine, because its small diameter allows
us to put more line on the reel. However, if we're only
going to be splicing in two or three colors of lead core,
we may spool up with a mono line like Berkley Trilene XT
in ten pound test. The mono has stretch, where as FireLine
does not, and that stretch can be helpful when fighting
in big fish when you have a lot of line out. Once the backing
is on the reel, then we'll connect the lead core segment
we want.
To do this we use a 18# ball bearing swivel and tie that
on the end of the backing. Then we'll peel back about four
inches of the Dacron from the lead core and remove the lead.
We then use the Dacron end to tie to the swivel, using a
clinch knot with five wraps (The clinch knot is much less
bulky than the improved clinch and therefore goes through
the rod's guides much easier). At the other end of our lead
core segment, we again remove four inches of lead and tie
in another swivel. Finally, we attach our leader, typically
fifty feet of ten pound test Berkley Trilene XT, our lure,
and we're ready to fish.
Now all that needs to be done is let out the lead core
and enough backing to reach the desired depth, attach the
board to the backing and continue to let out line until
the board is running where we want it. By segmenting the
lead core, the boards can be run further out to the side
than they can using straight lead core, allowing us to cover
more water and increase our chances of contacting more walleye.
It's an inventive way to solve one of fishing's many challenges.
<Back to Top
NIGHT BITE WALLEYE ACTION
By Mark Romanack
The trolling game is constantly evolving. I remember years
ago the first time I used an in-line planer board to troll
for walleye after dark. As the sun went down, I used a powerful
flashlight to keep tabs of the boards and to determine if
a fish had been hooked. Pretty crude, but it worked and
I caught fish. Hooked on the concept of night trolling I
started looking for better ways to fish.
It wasn't long before I graduated to using the glow style
cylume sticks taped to the planer board. The cylume stick
worked great, but they were expensive, hard to find and
only lasted a few hours. That proved to be a major problem
for an avid angler.
The next progression in the walleye night bite came in
the form of clip on battery operated lights produced by
Off Shore Tackle. Designed to blink, these little round
lights were clipped onto the flag of the planer board. The
battery power lasted a long time and because they could
be turned off at the end of the evening, they cost a lot
less to use than cylume sticks.
Off Shore Tackle improved upon those blinking lights by
coming out with the latest lights to hit the planer board
market; the new Off Shore Tackle OR32 (Night Light 2) and
OR33 (Night Light 3) night lights. The best way to describe
these unique planer board accessories is they look like
a lighted bobber mounted on the top of the flag used on
the OR12 Side-Planer. Indeed, these new lights are just
that. Available in both red (OR32) and green (OR33) (color
coordinated for you to comply with the nautical rules of
the road) these after market items screw right onto the
board and can be seen from a full 360 degrees.
No more blinkers. The new OR32 and OR33 are solid lights
that are easy on the eyes and simple to operate. The batteries
fit into an O ring sealed chamber. Just twist the bubble
and the light comes on. Twist it back and the light goes
off. Slick, waterproof and most of all everyone can now
see the light!
The OR32 and OR33 night lights can be fit to the OR12 Side-Planer
or the OR31 SST board. These useful trolling lights can
even be retrofitted to other board brands.
NIGHT TROLLING TIPS
A lot of trollers are in the dark both literally and figuratively
when it comes to fishing walleye after sundown. This fishing
method has grown in popularity, but many anglers simply
don't know where to begin.
Trolling after dark can be about fishing structure or it
can be about fishing the surface film. Those who fish structure
find that running a crankbait or other lure flat out the
back of the boat is the best way to maintain contact with
cover like weeds, rip rap or sunken timber.
Adding a planer board when a lure is likely to snag any
second just doesn't make a lot of sense.
Where planer boards do make sense is when fishing walleye
in open water. In the spring of the year, walleye move into
shallow water to hunt for smelt and other minnows. Trolling
with boards is the best way to target these fish.
Later in the summer, boards can be used to fish over the
top of cover like dense weed patches where walleye feed
actively all night. Shallow diving crankbaits set to just
skim the top of the weed cover make for a great way to target
fish overlooked by other anglers.
In the fall, monster Great Lakes walleye spend a great
deal of time feeding on shad, alewives, smelt and shiners
near the surface. Because of the ultra clear waters found
in most Great Lakes fisheries, much of this action takes
place after dark. Popular destinations like Lake Erie, the
Bay of Quinte, Saginaw Bay, Little Bay de Noc, Mille Lacs
and many other walleye fisheries offer spectacular night
time trolling opportunities for walleye.
Most of these fish are taken by trolling oversized shallow
diving crankbaits often referred to as stickbaits or jerkbaits.
Some popular lures that catch lots of fish include the Rapala
Husky Jerk, Reef Runner RipStick, Smithwick Rattlin' Rogue,
Storm ThunderStick, Yo-Zuri Crystal Minnows, Dave's Lures
Nitro Shiner and Rebel Minnow.
Each of these shallow diving minnow baits feature the subtle
action necessary when trolling slowly at night. The most
productive leads tend to be from 50 to 100 feet. Adding
an in-line board like the OR12 Side-Planer allows more water
to be covered and to contact fish that haven't been spooked
by the boat. Trolling after dark with lighted boards is
a sweet way to target trophy sized walleye other anglers
only dream of catching.
Besides targeting the right areas with the right lures,
night trolling for walleye is a game that requires a lot
of organization. A boat littered with unnecessary accessories
or cluttered with gear is a nightmare to fish in. In the
dark anything that can go wrong usually will. Keep these
issues to a minimum by only taking the necessary gear along
and keeping things stowed neatly away until needed.
A battery operated lantern provides just enough light to
do necessary chores including tying on lures or monitoring
the lead length on line counter reels. When you're actually
fishing turn off all lights except the bow and stern light
required by the USCG.
A hand held Q-Beam style light is the perfect tool for
shedding a little light on the subject of landing hooked
fish. These lights are powerful, light and they can be plugged
into an accessory port on the console. Most models offer
both a high intensity beam and a wider flood. The flood
feature works best for landing fish. The beam feature is
handy for locating boat launches in the dark and zapping
your buddies when they get too close to your fishing action!
Anytime you go fishing it's a good idea to tell someone
where you're going and when you expect to return. This goes
double and triple for fishing after dark. Should you run
into a problem in the dark, chances are they won't come
looking for you until daylight. Go prepared with a flare
kit, anchor and long length of anchor line. If you have
engine problems and are forced to anchor up for the night,
that's a lot better than drifting away into the blackness.
Keeping boat batteries and other gear in top working order
is always a good idea. When you fish after dark, it can
be the difference between catching fish and having fun or
spending a miserable night stranded on the water. The best
advice is to go prepared.
<Back to Top
RIGGED FOR SUCCESS
By Mark Romanack
Rigging a boat is a personal experience. In part this is
because different anglers favor different fishing methods
and or species. While there is no one right way to rig a
fishing boat, there are some pitfalls to avoid that can
save a lot of frustration and wasted time, money and fishing
opportunities.
HAVE A PLAN
The best advice about boat rigging is to have a plan before
accessories are purchased or the first hole is drilled.
Take a minute and sit in the boat. Imagine how different
fishing presentations will be conducted and try to get a
feel for where key pieces of equipment should be mounted
and how these accessories can best be rigged for function,
utility and convenience.
Take a roll of masking tape (I like the blue no mar type)
and tear off pieces that represent the approximate size
of gear that will be added to the boat like rod holder bases,
planer board brackets, downrigger swivel bases, sonar gimbal
mounts, etc. Stick the tape in position and write on it
what will be mounted at this particular location. Once everything
is laid out, it will be clear if certain pieces of gear
must be moved to provide the best function.
This simple step saves time by insuring everything works
well together. Nothing is more annoying than having to use
a graph that's angled slightly in the wrong direction or
a rod holder that blocks the opening to a dry storage compartment.
Even worse, who wants to drill a hole in a new boat, then
discover the holes are in the wrong location? Ouch!
PENNY WISE, DOLLAR FOOLISH
The accessories used in boat rigging can get expensive.
In part this is because quality gear comes at a premium,
but it's also because a lot of the items used in boat rigging
must be purchased in multiples of two. Rod holders are a
good example. Any boat that will be used for trolling will
need at least four rod holders and most would be better
equipped with six, eight or even 10!
When the reality of this financial dilemma sets in some
anglers opt for selecting accessories that are long on price
savings, but short on function. Saving money in this way
is truly penny wise and dollar foolish. Take a hard look
at the quality of various accessories before opting for
savings over function.
TRACK SYSTEM FLEXIBILITY
The only thing worse than rigging something in the wrong
spot, is finding out later you can't move things or add
new gear as the budget allows. This is the very reason I'm
sold on the track system for mounting critical accessories
like rod holders, electronics bases and downrigger brackets.
Track mounting systems accept a wide variety of fixtures
and accessories. The track system produced by Bert's Custom
Tackle is a good example of how to accomplish the rigging
job with a clean and professional touch, yet leave your
options open for changing systems and adding new gear down
the road. One the track is purchased and mounted, anglers
can install rod holders, drink cup holders, tool caddies,
electronics bases, swivel downrigger bases and on and on
from the same basic system. The importance of this flexibility
can't be overstated because no matter how much planning
goes into rigging a boat, there will always be more gear
to add.
MORE RIGGING ADVICE
Rigging a boat can be a daunting task for those who have
never undertaken this kind of project. Personally, I enjoy
the process of rigging boats for several reasons. Doing
the rigging myself gives me a sense of pride in the boat
and of course if something goes wrong I know were to begin
the trouble shooting.
Admittedly I'm also very particular about how my boats
are rigged, right down to the hardware used. Because I spend
a lot of time in my boat and I feel my fishing boat is an
extension of my personality, there is no way I'd turn over
the rigging chores to someone else.
That stated, it's important to note that having someone
else do the work isn't a bad idea in most cases. Frankly,
if you don't have the proper tools or knowledge of how to
use them, doing your own rigging is going to be a frustrating
experience.
Either way, if you rig your own or have it rigged the important
point is to make sure everyone is on the same page. A boat
that's rigged out to perfection is a pleasure to fish from
and in the long run you'll catch more fish. Isn't that what
you bought a boat in the first place for?
<Back to Top
SNAP ON, SNAP OFF
By Mark Romanack
Remember the Clapper? Who could forget? Turning the lights
on or off was as easy as clapping your hands! Trolling spoons,
spinners or crankbaits to a variety of depth levels is as
easy Snap On and Snap Off!
When the Off Shore Tackle Snap Weight Clip (OR16) was introduced
a few years ago it changed the world of trolling forever.
No need to use keel sinkers, rubber core, chain bead sinkers
and other in-line weights to achieve the ideal depth levels.
Just pinch a Snap Weight onto the line and go fishing!
The Snap Weight Clip looks like a planer board release,
but with some important modifications. Between the rubber
jaws, a small pin indexes into a hole in the rubber pad.
When the fishing line is placed behind this pin and the
clip closed, the Snap Weight stays right where it was put
until the angler removes it. It's important to note that
Snap Weights are designed to function with monofilament
lines. Super braids and fused lines are slippery and the
Snap Weight will slide on these line types. To avoid this,
wrap the braided or fused lines twice around the jaw.
The ability to put weight anywhere on the fishing line
and then remove it as needed is more useful than a third
hand in rock, paper scissors contest! The weight can be
placed near the lure or further up the line to avoid any
chance of spooking the fish. Snap Weights can be used to
target shallow or deep fish. By simply changing the amount
of weight used just about any depth from the surface to
50 feet or more can be targeted easily and accurately using
Snap Weights.
The Snap Weight Clip is, without question, the most simple
and easy way to add weight to any fishing line. Handy for
fishing unweighted lures like flutter spoons and crawler
harnesses, Snap Weights can also be used to gain additional
depth from diving crankbaits or weighted spoons.
THE 50/50 METHOD
When trolling weight systems, trolling speed and lead length
both have an impact on running depth. The folks at Precision
Angling, producers of the Precision Trolling Depth Guide
developed a system for fishing Snap Weights known as the
50/50 Method. This simple approach to Snap Weight trolling
controls the key variables and provides a useful depth range
for each size weight commonly used with Snap Weight Clips.
"Fishing the 50/50 Method is easy," says trolling
expert Mark Romanack. "Select your favorite spoon,
crawler harness or shallow diving crankbait and let it back
behind the boat 50 feet. At this point, clip on the OR16
Snap Weight and then let out an additional 50 feet of trolling
lead. By consulting the Snap Weight chart in the Precision
Trolling book you'll be able to determine how much weight
is needed to fish various depths."
When a fish is hooked trolling Snap Weights the angler
simply reels in the fish and the weight at the same time.
When the Snap Weight reaches the rod tip, quickly remove
it and continue fighting the fish. Putting a Snap Weight
on or off the line takes less than a second! (PHOTO HERE)
Sticking with the basic 50/50 Method is a good starting
point and great way for anglers to know approximately how
deep they are fishing. "I recommend the 50/50 Method
a lot, but I also encourage anglers to use Snap Weights
with other lead combinations," says Romanack. "Once
you get comfortable fishing Snap Weights there is no limit
to the lead and weight combinations that can be used to
target all species."
SNAP WEIGHTS AND PLANER BOARDS
Snap Weights can be fished as flat lines, but to really
get the most from these trolling weights, use them in combination
with either in-line or dual planer boards. The weight sizes
most useful for planer fishing include 1/2, 3/4, 1, 1.5
and 2 ounces.
GETTING DEEP WITH SNAP WEIGHTS
The clip on the Snap Weight is capable of securely holding
up to 16 ounces on a monofilament fishing line. By using
three, four, six or eight ounce weights or combinations
of these, anglers can target fish in deep water or near
bottom at just about any common fishing depth. The best
results are achieved when the Snap Weight is fished at least
two feet off the bottom. This eliminates the problem of
snagging, yet still allows the water column to be saturated
with lures.
ôWhen IÆm fishing Snap Weights in deep water,
I always use a line counter reel to carefully monitor lead
lengths,ö suggests Romanack. ôThe line counter
reel allows productive lead lengths to be duplicated quickly
and easily. It works best to start at or near the bottom
and then work your way up in the water column. This way,
you have confidence that the Snap Weight and trailing lure
is fishing the entire water column.ö
KITS OR BY THE PIECE?
Snap Weights can be purchased in a convenient kit that
contains four clips, split rings and an assortment of common
weights. Additional clips and weights can also be purchased
separately. The kit is a great way to get started enjoying
the benefits of Snap Weights.
THE POWER OF SNAP WEIGHTS
No matter how you fish them, Snap Weights are powerful
trolling aids. Used as flat lines, in combination with planer
boards or to dredge up deep water species, Snap Weights
are effective and as easy to fish as clapping your hands.
Snap On, Snap Off.
<Back to Top
TAKE CARE OF THOSE FISHING RODS
By Dave Dybowski, Eagle Bay Outfitters
Protecting your favorite fishing rods is a simple matter,
will provide years of pleasure, and protect your investment.
The following are simple maintenance tips that will protect
your fishing rods for years to come.
CLEAN YOUR FISHING RODS AS NEEDED
Fishing rods are meant to get wet. Don't be afraid to clean
your rods. To clean cork grips and return them to like new
condition simply run them under warm water and lightly scrub
with a Brillo pad. Rinse with clear cold water and let air
dry. When dry your cork grips will look like the day you
bought them. For foam grips, run under warm water and use
dish soap with a foam pad to scrub. Rinse with cold water
and let air dry. When scrubbing grips be careful not to
scratch the blank (rod body) or reel seats with abrasive
solutions. To clean the rod blank (body) itself, use a simple
dish soap solution and sponge to do the job. Wipe dry with
a soft non-abrasive cloth or towel.
LUBRICATE YOUR FERRULES
The ferrule is where the sections of the rod connect. Dirt
and grime often builds up in those areas and makes tear
down difficult. To remedy simply wipe the connection clean.
Once the area is dirt & grime free apply a light lubricant
to the male end of the ferrule. The absolute best lubricant
I have found is the oil found on ones nose area. That's
right, simply rub the rod on the area where the side of
your nose meets the cheek and you will have a perfect lubricant
for your connection. Commercial lubricants are too oily
and slippery and will cause your connection to come apart
while casting.
REPLACE THOSE ROD TIPS
The guide that receives the most wear and tear on a fishing
rod is the guide at the tip of the rod. This guide is called
a tip-top. They can easily be replaced by lightly heating
the old one and slipping it off the rod. Buy some tip-top
cement and reapply the new guide. Keep the cement in your
tackle box for emergency use while fishing. Do not use a
permanent glue to attach tip-tops. The only way to remove
a guide that was permanently glued is to cut the tip of
the rod off. Save that method for car doors and trunk lids.
TAKING APART RODS
If you encounter a stubborn rod that doesn't want to come
apart, here is a simple, safe, effective way to take the
rod apart. Place the rod behind your back and parallel to
the ground. While crouching down grasp the rod with both
hands (one on either side of the ferrule) and pull with
an outward motion (each hand pulling out to each side of
your body). This method will apply even pressure with both
arms and the rod should come apart quite easily.
USE PROPER LINE
When you purchase a fishing rod follow the line weight
recommendations that are printed on the blank (rod body).
Probably the fastest way to break a fishing rod other than
the car door and trunk lid is to use a line too heavy for
your rod blank. Pay attention to line weigh recommendations
and your fishing rod will last for many years.
<Back to Top
TAKE MATTERS TO HAND
By Mark Romanack
Sometimes the only way to get something done right is to
take matters into your own hand. In the case of river walleye
fishing, a length of stainless steel wire adds up to a handful
of fishing fun.
The art of handlining or wirelining as it is sometimes
called is without question one of the most unique ways to
target walleye. As effective and efficient, as it is unique,
handlining is one of those fishing methods the majority
of anglers don't understand or appreciate. After all, how
much fun can fishing be without a rod and reel?
The answer is don't knock it until you've tried it. Handlining
is not only fun, it's one of the best ways to target river
walleye in all fishing conditions. No matter how cold the
water gets or how the clarity suffers, handlining will produce
fish. Plain and simple.
WHAT'S A HANDLINE?
For those wondering what's a handline, imagine a spring
loaded fly reel. These reels are designed to pick up slack
line quickly, without having to turn a spool handle.
Handline reels function much the same way, but they are
larger and loaded not with fly line but rather stainless
steel wire. At the end of the wire line is a heavy duty
snap that attaches to what handliners call a shank. A shank
is nothing more than a short leader with clevices attached
at key points that work to separate monofilament leads.
The heavy snap clips to one end of the shank and a heavy
weight clips to the other end. In between a couple different
clevices provide an attachment point for two different lengths
of trolling leaders.
The clevice closest to the weight is 18-24 inches off the
bottom and accepts a leader about 20 feet long. At the end
of this leader a shallow diving stickbait becomes the bait.
Another 18-24 inches up the shank is a second clevice that
accepts a longer leader. This leader is normally 40 feet
long so the attached crankbait can dive down near the bottom.
When this whole handlining system is in the water and fishing,
the weight is lowered until it ticks along the bottom. The
trailing crankbaits on the respective leaders fish just
inches over the bottom, where walleye can see them!
HOW ARE FISH LANDED?
One of the benefits of wire line trolling is bites are
easy to determine. The lack of stretch in wire telegraphs
even the most subtle strike right to your fingers.
When a fish is hooked, the angler allows the wire to be
coiled up inside the spring loaded reel. When the shank
comes within reach the weight is lifted into the boat and
the angler pulls on both leads to determine which one has
the fish on it.
The leader that doesn't have a fish is looped over the
angler's head to keep it out of the way while the fish is
pulled in hand over hand. When the fish gets to the boat,
a quick pull is all that's necessary to literally flip the
fish right into boat. It's that quick and easy.
The lure that caught the fish is removed from the fish
and returned to the water. The second leader is unlooped
from around the angler's head and the weight is lowered
back over the side of the boat. As the weight is returned
to bottom, the trailing lures are put back to work.
Leaders are fashioned from heavy 20-25 pound test monofilament
line that is resistant to kinking and tangling. Thinner
leader material quickly ends up tangled or broken.
UPSTREAM OR DOWNSTREAM?
Handline trolling can be conducted both upstream and downstream,
but most anglers favor upstream trolling. This is especially
true early in the spring when the water is cold and a slower
presentation will trigger more strikes.
Moving upstream the angler doesn't simply troll aimlessly,
but rather keeps track of subtle changes in the bottom depth
and follows these depth changes as closely as possible.
River walleye travel along the bottom at predictable locations.
Anywhere the bottom shows contour, walleye are likely to
be close by. Channel edges are top fishing spots, but even
a subtle depression in the bottom can hold a number of fish.
No other form of fishing allows anglers to develop this
intimate sense for the bottom composition or how fish are
relating to these structural elements.
RIGGING YOUR BOAT
Almost any boat can be used for handlining, but smaller
models that allow the angler to sit in the back of the boat
and easily reach over the side and touch the water are best.
The boat can be powered by a tiller outboard or a small
kicker motor.
Normally two anglers fish together, both facing forward
and one sitting on the port side of the boat and the other
on the starboard side.
The handlining reel functions best when mounted just above
the gunwale of the boat about half way between the transom
and the bow. This rigging location keeps the handline reels
out of the way for other fishing applications and works
to reduce the chances of getting the wire caught in the
outboard motor.
Bert's Custom Tackle, www.teclausa.com produces the best
method for custom rigging handline reels to fishing boats.
The Bert's system incorporates a short track that is mounted
to the gunwale of the boat. The track accepts a reel mounting
bracket designed especially for handline reels.
The reel bracket serves several purposes including raising
the reel above the surface of the gunwale, positioning the
reel in an upright orientation and aligning the wire line
slightly off the side of the boat. This placement is perfect
for keeping the wire running smoothly and avoiding tangles.
When it's time to put the handline reels away, the whole
system can be removed in seconds, leaving nothing but a
handy step pad behind. This rigging method is as affordable
as it is slick and efficient.
Guys who do a lot of handlining like to keep their boats
organized and clean. Anything left laying on the floor or
deck of the boat is likely to get tangled in one of the
leaders. Being organized is the best way to fish without
tangles that can turn a fun day of fishing into an afternoon
of frustration.
WHERE TO FIND HANDLINING GEAR?
Every tackle show isn't going to stock the unique products
required for handline fishing. Riviera Trolling Systems
Incorporated produces a handlining kit that includes a Kachman
Automatic Reel loaded with 200 feet of 60# coated wire,
Tempress Rod Holder Adapter, Allen Wrench, Aluminum Clamp
that rail mounts ¾" to 1 ¼" rails,
a shank and a 1.25 pound weight. This ready to fish system
only requires the angler to add his own leaders and lures.
For more details on dealers that stock these kits or how
to purchase directly from Riviera log onto www.rivieratrolling.com.
BREAKING WITH TRADITION
Most river anglers are jig fishermen at heart. Handlining
couldn't be more different than jigging, but in the same
token this unique form of fishing has advantages jigging
doesn't offer. The only way to fully appreciate handlining
is to try it and see for yourself. You might just discover
that the best way to catch walleye is to take matters into
your own hands!!
<Back to Top
THE BIG THREE OF WALLEYE LURES
By Mark Romanack
Open water walleye fishing continues to grow in popularity.
The art of catching these popular fish suspended in the
middle of nowhere may seem foreign to many, but developing
the skills of a master troller is as easy as 1-2-3. Three
simple lure groups are all a troller needs to catch open
water walleye no matter where he or she may travel. Crankbaits,
trolling spoons and crawler harnesses or what walleye guys
simply call spinners are the tools of the open water trade.
Regardless of the body of water, depth the fish are holding
at or their attitude, one or more of these lure groups is
going to get the job done.
CRANKBAITS
Of the three lure groups useful for open water trolling,
crankbaits are the most complex. Available in literally
every size, shape and color imaginable, crankbaits suitable
for walleye trolling are best categorized in three different
groupings that focus on both shape and action. All of these
groups are made up of lures that float at rest and dive
when trolled. Sinking style crankbaits typically make poor
trolling lures because it's more difficult to predict their
respective running depths.
Of the three crankbait categories in question, baits that
feature a slender minnow shape or profile top the list,
followed by shad shaped lures and finally by fat body baits.
Among these lure shapes, the more slender minnow shaped
lures produce the most subtle or tight wiggling action.
Shad lures feature a little more open wobbling action and
fat body lures have the most aggressive side-to-side wobble
of all crankbaits.
Which lure shape and respective action that's likely to
work best depends on the water temperature and the specific
attitude of the fish. In cold water, subtle minnow lures
are by far the best producing lures. Subtle action combined
with modest trolling speeds usually add up to the best cold
water success.
As the water temperature warms into the 50 degree range,
both minnow and shad body lures are good choices. The added
action shad baits provide can really pay off in spring and
fall when the water temperatures are cool, but not cold.
As summer approaches and warm water temperatures rise above
70 degrees, all three lure groups can potentially produce
well. Often fat bodies with lots of action are the prime
lures for warm water trolling, but both shad and minnow
lures can also be productive in warm water.
The rule of thumb is that in cold water the best trolling
speeds are 1-1.5 MPH. In cool water trolling from 1.5-2
MPH usually works best with both minnow and shad lures.
When water temperatures spike above 70 degrees, faster trolling
speeds almost always produce better than slower speeds.
An average speed of 2.5-3 MPH represents a good standard
for trolling minnow, shad and fat body lures in warm water.
Understanding the dynamics of how crankbaits work is critical
to getting the most from these lures while walleye trolling.
Two simple factors control the diving depth of all crankbaits.
Lead length is the primary factor that determines how deep
a crankbait will dive. Longer leads allow lures to achieve
more depth, while modest leads restrict the diving ability
of a crankbait. By simply manipulating lead length, an angler
can literally target his or her lures to precise depth levels.
A line counter reel is the best way to monitor trolling
leads and also to duplicate effective leads. There is simply
no substitute in trolling for owning and using a good set
of line counter reels.
For more details on crankbait depths, line counter reels
and other trolling facts, check out the web site www.precisionangling.com
and the book Precision Trolling. This unique user guide
offers up accurate running depths for nearly 400 different
popular crankbaits and other trolling gear.
The second factor that influences on crankbait diving ability
is line diameter. Thin diameter lines have less resistance
in the water and allow these lures to dive deeper than the
same bait fished on thicker lines.
A wealth of quality lines are marketed towards walleye
trolling. Some of these lines represent the highest technology
ever offered in fishing lines, yet even with the advantages
of modern science it's hard to beat nylon monofilament as
a trolling line. Monofilament lines are relatively thin
in diameter, strong, the have good knot strength, controlled
stretch and they are reasonably priced. Brand loyalties
aside, good trollers tend to favor hard surfaced or abrasion
resistant lines. A 10 pound test monofilament is the perfect
choice for nearly all open water walleye trolling applications.
SPOONS
Like crankbaits spoons come in a lot of shapes, sizes and
colors. Many of the spoons on the market are not designed
for trolling, but rather casting. Thin, flutter style spoons
are the best choice for open water walleye trolling.
Despite the huge assortment of flutter spoons on the market,
an amazingly small selection are suitable for walleye fishing.
Most spoons are designed for trout and salmon fishing. These
spoons are designed to imitate larger forage species like
alewives.
Because walleye tend to feed on smaller minnow species,
a smaller spoon is required to consistently catch them.
Of the brands available, two dominate the walleye trolling
scene including the Scorpion by Advance Tackle Company and
the Jr. Streak produced by Wolverine Tackle Company. Both
are downsized spoons that have good action at a wide variety
of speeds, making them useful for fishing in both cool and
warm water conditions.
Unlike a crankbait that has a lip that allows the lure
to dive to a particular depth, flutter spoons have no natural
dive profile. Instead, walleye trollers use a couple key
products that help deploy spoons at the precise depths required
to catch open water fish.
Two styles of diving planers work well for spoon fishing.
The first group is known as mini divers. These trolling
aids are essentially smaller versions of divers popular
among trout and salmon trollers. The fishing line is attached
to the mini diver and a six foot leader added to the back
of the diver. The spoon is then attached to a ball bearing
swivel at the end of the leader. These pint sized divers
range in size and also the depths they achieve. For most
open water walleye applications the small or medium size
disks work great.
The Luhr Jensen Jet Diver is the second diver useful for
trolling walleye spoons. Like a crankbait that floats at
rest and dives when trolled, Jets have the advantage of
being buoyant. A spoon attached to a six foot leader is
tied to the back of the Jet and the main line attached to
the front. Trolling depth is controlled by the size of the
Jet and also the amount of lead length used. The most popular
sizes of Jets include the 10, 20 and 30.
Mini disks and Jets perform nearly identical functions.
Neither of these designs offer a clear advantage over the
other. The top names in mini divers include Luhr Jensen,
Big Jon and Walker.
CRAWLER HARNESSES
The third lure group every open water walleye angler should
be familiar with are harnesses or spinners. A rotating blade
with a few colorful beads and a fat nightcrawler represents
an almost impossible to ignore combination. Of the three
primary lure groups, spinners work the best when walleye
are playing lock jaw. During cold fronts open water walleye
can often be difficult to catch. Spinners are the answer
more days than not when walleye fishing gets tough.
Like spoons, spinners have not natural dive profile. They
need to be fished in combination with divers or weight systems
to achieve the necessary depths where walleye suspend.
Without question, Snap Weights are the most popular system
for trolling spinners. A Snap Weight is little more than
an OR16 Snap Weight Clip (it looks like a small planer board
release) that has a strong spring tension and a plastic
pin that protrudes through the rubber pads. When the Snap
Weight Clip is opened and the fishing line placed behind
the pin located in the center of the rubber pads, the OR16
is held firmly in place on the line. Weights are added via
a split ring, making it easy to add or remove weight as
needed and also to position the Snap Weight literally anywhere
on the fishing line.
The versatility of the Snap Weight is a major reason this
simple trolling system has become so popular. The best way
to get started fishing Snap Weights is to purchase a Snap
Weight Kit complete with four OR16 clips and an assortment
of weights ranging from 1/2 to 3 ounces. More clips, split
rings and weights can be purchased separately as needed.
IN-LINE PLANERS
All of the lure groups used for open water trolling are
best when fished in combination with in-line planer boards
like the popular Off Shore Tackle Side-Planer and SST boards.
Each of these are designed to transport one line out to
the side of the boat. Once the board is deployed out to
the side, it doubles as a strike indicator.
When a fish is hooked the weight of the struggling fish
pulls against the in-line board. The board in turn is pulled
backwards in the water making it easy to determine when
a fish has been hooked.
The angler responds by reeling in both the board and the
fish at the same time. When the board nears the boat, it
can be quickly removed and the fish fought to net.
The typical walleye troller fishes two Side-Planers per
side of the boat. Should a fish get hooked on an outside
line, the inside line is quickly reeled in to prevent lines
getting crossed.
When clearing an inside line, there is no need to remove
the planer board. Simply reel up until the board touches
the rod tip and then lay the rod down on the opposite side
of the boat. An extra rod holder is the best way to keep
this line free of others and out of the way.
Once the fish has been landed, the line that was cleared
can be dropped back into the water and allowed to work out
to the side. This flip flop approach makes it easy to keep
lines fishing effectively without fear of tangles.
SUMMING IT UP
Understanding and using the three major lure groups, incorporating
mini divers and Snap Weights into the trolling program and
using Side-Planers to gain additional lure coverage are
the most important aspects of mastering an open water trolling
program for walleye. There is no substitute for spending
time on the water refining these fishing skills. Remember
it's a fundamental understanding of the basics that puts
fish in the boat. Save the razzle dazzle for the dance floor.
<Back to Top
THE PLANER BOARD EVOLUTION
By Larry Hartwick
Riviera first offered a dual planer board back in 1992.
The initial planer design was quite revolutionary because
for the first time, planer boards could be easily folded
and stored, instead of being a cumbersome nuisance for half
of the season. Now you didn't need to sacrifice valuable
space on the boat to insure that you had a full arsenal
at your disposal. I can remember vividly when we used stationary
wood planers that took up half of a cabin bunk. After fighting
them for a month after the fish went deep, we would invariably
leave them on shore for the balance of the summer. That
was usually when the lake would roll over and we would find
cold water on the surface and have no planer boards on board.
We don't have that problem anymore due to the fact that
the planer boards now require a fraction of the space they
used to take up. If you are still fighting with non-collapsible
planer boards, you should really consider the options available.
Someone who looked at the first model that came out and
the model produced today wouldn't see a lot of difference
in the outward appearance in the planer board. There are
however, major changes that have been implemented over the
course of fifteen years of manufacturing. Every one of these
changes is in response to trying to make the best possible
product for the money that you spend. If we see a way that
we can modify a product for the better, we have never hesitated
in doing that even if additional tooling costs have been
incurred.
I like to compare the changes that we make to the ever
changing automobile industry. They have come a long way
in fifteen years in terms of reliability and longevity of
their products. We have also.
The changes to the DPB (Dual Planer Board) for 2007 are
mainly things that the eye can't see. The ballast has been
changed along with the foam flotation as well. These changes
will improve the amount of weight that can be towed from
the planer tow lines. These changes were actually implemented
in the middle of 2006, so if you purchased them last summer,
you probably have the latest updates. It should be pointed
out however that the DPB's were never designed to pull Dipsey
Divers and #40 and #50 Jet Divers. Anything that pulls like
the bottom of the lake is definitely going to pull the DPB
backward. Dual planers are designed to pull crankbaits,
Jet Divers up to #20, lead core, copper , wire line, Diver
Discs and an array of various devices and lures that don't
exceed the pull of a full lead core.
The changes in 2007 to the TPB (Triple Planer Board) are
more dramatic. The tow arm is now molded out of polycarbonate
(Lexan). What this means to the consumer is that the arm
is virtually indestructible. Is Lexan more costly? Yes,
but in terms of strength, there are few materials that are
stronger. We have actually bent the arm around until the
inside and outside boards touched and the arms simply spring
back to their original shape. That's tough! The ballast
has also been changed in mid season in 2006. This is an
ongoing quest to increase the performance level of the TPB.
While I hesitate to say that this is the last ballast change,
it is for the foreseeable future. The TPB is literally awesome
in big or small water. I am actually amazed at what can
be pulled by it in terms of sheer weight. We started out
pulling four full lead core rigs easily. Now the Striper
anglers in the famous Chesapeake Bay are pulling two of
their huge umbrella rigs that weigh 2 pounds apiece. They
then add 1-2 pounds of weight in front of the rigs to get
it down! If this doesn't sound like a lot, consider that
your favorite salmon rod probably isn't up to the task of
pulling one. The drag is unbelievable, but the TPB will
pull them. If you are pulling baits the dual boards aren't
up to, the triples will get it done.
Big fish require big baits and these anglers are taking
50 pound fish every year now. The Chesapeake Bay is a modern
day success story and those of you that haven't had the
opportunity to sample it are missing out on truly a world
class fishery. The Stripers come back to the bay as the
water cools down in the fall and within 3 days, the bay
will have fish the entire length of the bay from Rhode Island
to Virginia. October and November are usually the peak months.
Happy planer board fishing!
<Back to Top
THINK OUTSIDE THE BOX FOR LAKERS
By Dave Dybowski, Eagle Bay Outfitters
Here are a few tricks that will hopefully change the minds
of many anglers who seem to think lake trout are an unworthy
opponent. The lake trout in my mind is the most underrated
fish that swims our waters, not to mention one of the best
tasting fish one can enjoy. They have provided many anglers
with a great day on the water when some of the other species
we so actively pursue come down with a severe case of lockjaw.
They can be a more than worthy opponent if we take a non
typical approach to these great game fish.
I'm not talking about lakers on lead core or lakers on
wire three hundred feet behind the boat. I'm talking about
a dedicated approach to get the maximum experience that
lake trout have to offer.
Before we continue I know that some of the purists out
there will think what they are about to read is totally
absurd. The following is for the anglers out there that
want to get the most bang for their buck. If tried, I'm
sure more people will give the lake trout the respect they
deserve. I've used the following tactics to offer my clients
a great day on the water. Give them a try and you too will
see what thinking outside the box can do to enhance your
Great Lakes fishing experience.
GO LIGHT FOR LAKERS
By going light I'm talking about equipment. Who said you
can't load up a downrigger with a rod typically used for
steelhead fishing on the rivers. We're talking light line
and very forgiving rods. This approach requires using Off
Shore Tackle's OR1 Medium Tension Downrigger Release, very
sharp hooks and you must reduce the number of rods you use.
What we do is just run two riggers down with these rods
and release combination, add trolling spoons and that's
it. By doing this when we get a hook-up we can put the boat
in neutral without having a big mess with a lot of baits
dangling below. You don't have the boat resistance and it's
just you and the fish. To land a fish like this takes teamwork
from the entire crew but it is a fight you won't soon forget.
A fly rod can also be used for this providing it has a long
enough handle to put in the rod holder. I'm sure we just
lost the purists but those that have an open mind keep reading.
GET YOUR JIGS OUT
Put some meat on them and hit the bottom. I'm talking big
jigs that will go down 100 feet or more. This approach requires
calm water with very little current. If the conditions are
right and you are over fish (preferably lots of fish) put
the boat in neutral, drop your jigs over the side and jig
with three to five foot jigging motions. Pause between jigging
motions and be prepared for anything from a light tap to
some pretty vicious strikes. Braided or super lines work
well for this type of fishing. It's best to watch your electronics
and when you come over a lot of fish on the bottom go to
work.
ATTRACTORS AREN'T JUST FOR FISH PAINTED SILVER
The latest craze the past couple of years has been pulling
rotating attractors with gaudy flies attached to entice
salmon to strike. This is nothing new to the lake trout
or the anglers chasing them that were present in our waters
way before our silver transplants. What is commonly known
these days as a salmon set-up is absolutely deadly on lake
trout. The trout taken with this approach are often times
your bigger fish and can be caught anywhere in the water
column from up high to right down on the bottom.
Now that we have covered a couple of unconventional ways
to maximize our fishing experience, I would like to give
the readers techniques to maximize the trout as table fare.
This is another area where the lake trout is greatly misunderstood.
I stand behind the claim that properly prepared lake trout
is the best eating fish that our offshore anglers can enjoy.
PREPARATION
First and foremost the lake trout as any fish needs to
be taken care of properly once they are caught. Aside from
placing your fish on ice until they can be cleaned, many
anglers (this one included) believe that bleeding out a
fish once caught greatly enhances the fish at the table.
This is accomplished by cutting the gills and dragging the
fish through the water a minute or so until blood is no
longer streaming from the fish. This not only provides you
with a better fish for the table, it also will keep your
cooler much cleaner throughout the day on the water.
Now it's on to the fish cleaning station. To maximize the
quality of your fish for the table I am a firm believer
that the best way to clean a fish for the table is by filleting,
skinning, and removing the lateral line. Fish cleaned in
this manner can be cooked anyway you desire, including frying,
boiling, grilling and smoking. Many of our clients want
the skin left on for smoking. Once they try smoking fish
with the skin off they see the advantages of having the
skin removed.
Once your catch is cleaned and rinsed properly I feel the
absolute best way to freeze fish is to use a vacuum sealer.
They are relatively inexpensive and will preserve fish longer
than any other method I have seen. This is a good inexpensive
way to save your catch for later use.
So far we have caught the fish, cleaned our catch and prepared
our catch for future use. Now it's time to enjoy the fruits
of our labor. I like to prepare fish according to the size
of the fish. A general rule of thumb is the bigger the fish
the more oily the fish. This holds true for all fish, not
just lake trout so I group my catch in size ranges and act
accordingly.
Since we are talking lake trout, here is a general rule
I follow. Trout up to seven pounds I will either grill,
or deep fry. Seven to ten pound fish I will use for fish
boils and fish upward of ten pounds I smoke. As you can
see, the bigger the fish, the more oil I try to remove from
the fish. By following these simple guidelines you will
never look at a lake trout the same way. Prepared properly
they will provide you with many great meals. The following
recipes are some of my favorite methods of preparing lake
trout.
DEEP FRIED LAKE TROUT NUGGETS
Ingredients:
Lake trout cleaned as mentioned and then cut into 1"
cubes
Drakes Crispy Fry Mix
Vegetable Oil
Cayenne Pepper (optional)
Recipe:
Add a box of Drake's Fry Mix to a plastic food storage
bag and place cubed fish into this mixture. Shake the cubes
in this mixture and place in refrigerator for about an hour.
Heat oil in your deep fryer to 400 degrees and slowly add
fish to oil. Fry until golden brown and remove to a platter
covered with paper towel to absorb any oil that may remain
on the fish. When the fish is first removed from the oil
is the time to sprinkle on cayenne pepper (if desired);
the fish is delicious without adding the cayenne pepper
as well. Serve with tarter sauce and enjoy. For this recipe
I will use fish that are up to seven pounds. I was first
introduced to this recipe at a local restaurant that cooks
your fish for you. Their recipe has more spices to the mixture
and is great, but this is a good way to try at home.
FISH BOIL
Ingredients:
Cubed fish slightly larger than 1" cubes
Table salt
Carrots cut to serving size
Red skin potatoes peeled and quartered
Onions quartered
Melted butter
Lemon Pepper
Recipe:
Bring salt water to a rolling boil (about 1 cup salt for
2 to 3 gallons of water). Once water is boiling add carrots,
potatoes and onions. Bring water to a rolling boil for 11
minutes or until vegetables are tender. Remove vegetables,
keep warm and add cubed fish. Bring fish to a rolling boil
for 11 minutes or until cooked through. Serve fish and vegetables
together and drizzle with melted butter. Sprinkle lemon
pepper on top. This recipe is great for larger groups and
a turkey fryer used outside will work well for this recipe.
Any leftovers can be used later the same way you would prepare
canned tuna or salmon. I use fish up to 10 pounds in size
for this recipe.
SMOKED LAKE TROUT
Ingredients:
Lake trout fillets (skinned and lateral line removed)
Kosher salt
Apple Juice or apple cider if available
Brown sugar
Honey
Recipe:
In a non-metallic bowl add ½ cup salt, 1 cup dark
brown sugar and 1 gallon apple juice. Let the fish refrigerate
in this mixture overnight. Remove fish and rinse with cold
water. Place fish on smoker racks and rub brown sugar on
the fish. After adding the brown sugar drizzle the fillets
with honey. Place in the smoker and add wood.
I've tried every wood imaginable from drift wood to pecan
wood and blends of them all. I have finally come to grips,
after 30 years, that for my taste hickory is the best wood
for smoking fish. If you want to kick up your hickory, soak
the wood in bourbon for a couple of days before using. The
aroma from this soaked wood while smoking is unbelievable.
Every smoker is different so keep an eye on your fish often.
The fish will only absorb the smoke for about the first
couple of hours before it seals off. The rest of the time
is just needed to finish cooking.
Once I remove the fish from the smoker I put them in either
a plastic storage bag or Tupperware type container and place
in the refrigerator. The sealed off warm fish placed in
the refrigerator will add moisture to the finished product.
The smoked fish also freezes well (by using a vacuum sealer)
for later use.
SMOKED LAKE TROUT DIP
Ingredients:
1 pound of the smoked lake trout flaked
16 oz softened cream cheese
1 cup mayonnaise
½ Tbsp Dijon mustard
½ Tbsp lemon juice
1 tsp dill weed
Few pinches black pepper
Recipe:
Add all ingredients in food processor or blender until
blended well. Use as spread on your favorite crackers. This
recipe was originated by Auk Nu and Allen Marine Tours of
Juneau, Alaska. Their recipe is for sockeye salmon. I simply
used lake trout instead and it is delicious.
Hopefully this article will change some ways of thinking
and bring the awesome lake trout to the top of the list
of fish to catch, where it belongs. There is no doubt that
salmon, steelhead, and brown trout are awesome fish and
each has their unique qualities. These are just a few options
to try the next time you think a lake trout is a sub-par
opponent.
<Back to Top
TID BITS
When out hunting, take an OR32 Night Light 2 (Red) or OR33
Night Light 3 (Green) out with you in the woods. Once you
have had your successful hunt, turn on your OR32 or OR33
and place the light by your game so that when you come back
to retrieve it from the woods, you'll be able to see the
light to easily find your trophy!
TID BITS
With the OR32 Night Light 2 and OR33 Night Light 3 having
a 360 degree visibility, not only will you be able to keep
a visual on your boards but the other anglers will be able
to see your boards as well so they can avoid running over
your boards and lines!
<Back to Top
UNDERSTANDING TROLLING LINES
By Mark Romanack
In the course of a year I do dozens of fishing seminars
and answer countless trolling related questions via the
internet. Overwhelmingly the most common questions deal
with fishing lines. More specifically, trollers what to
know what lines are best for specific trolling applications.
The simple answer is it depends. Sound like a cop out?
It isn't. To get the most from fishing lines anglers must
take a close look at each presentation and then decide what
line type is best suited to the challenge. No single line
type can be recommended for all trolling situations, unless
compromise is a part of the equation.
Part of the confusion over fishing lines stems from the
many different kinds of lines introduced in the last few
years. The flood of fishing lines that new technology has
made possible is seemingly growing faster than anglers can
digest these products. Currently anglers can pick from nylon
monofilament, co-polymer monofilaments, fluorocarbon, fluorocarbon/monofilament
blends, spectra braids, fused fiber lines, stranded steel
line, solid steel line, stranded copper line and lead core
line. See what I mean about confusing options?
The questions becomes where do you start and at what point
do you draw the line? Obviously it's not practical to own
and use every one of these line types. Allow me to shed
a little light onto this gloomy subject.
OVERVIEW OF FISHING LINES
It's important to note that despite the many technological
advances fishing line has made in recent years, garden variety
nylon monofilament is still one of the most versatile products
available. What makes ordinary monofilament useful are its
combined properties. Monofilament line is relatively thin
and strong for it's diameter, it holds knots well, is abrasion
resistant enough to hold up to hard fishing, comes in a
wide variety of colors, contains a satisfactory level of
stretch and the cost involved with filling multiple trolling
reels is reasonable.
Line manufacturers are fond of promoting their newer products
as if they were the best thing to hit fishing since hooks!
In reality the degrees of improvement in these lines compared
to ordinary monofilament is in some cases marginal.
Co-polymer lines are a good example of this. These highly
toted fishing lines are similar to nylon monofilament but
produced using slightly different chemical formulations
that enable the line to be slightly thinner in diameter
for the rated break strength and/or to produce a little
less stretch. These are good properties, but the increased
cost of these lines hardly justifies these modest improvements.
Marketing campaigns, slick advertising and high dollar
personal endorsements are what fuel the popularity of these
new products, not their greatly improved performance on
the water.
A lot of confusion also exists between spectra braided
lines and fused lines. Spectra is a super strong and thin
fiber that when wrapped into a braided line creates an exceptionally
strong line with super thin diameter and nearly no stretch.
The primary disadvantage of this line type is the poor knot
strength. Because spectra is a slick material, ordinary
knots tend to slip and fail with this line. Special purpose
knots like the polamar, work well when fishing spectra braids.
Fused lines are made from a different fiber known as microdyneema.
Instead of the fibers being braided, they are fused together.
Fused lines have a little more body than spectra braids
and they can be produced in smaller break strengths. Fused
lines have nearly zero stretch and are thin in diameter,
but they tend to fuss up and abrade fairly quickly. Like
spectra braids, fused lines require the use of special knots.
The cost of both spectra braids and fused lines is nearly
triple that of monofilament lines. This alone is the biggest
disadvantage to using these lines. Loading four, six or
eight high capacity trolling reels can cost a small fortune.
Stainless wire, copper wire and lead core are specialty
lines that have their place in trolling. While these line
types are useful, the majority of trolling chores can be
handled with either monofilament or one of the low stretch
braided or fused lines.
DOWNRIGGERS
The best way to get the maximum value out of fishing lines
is to break down the respective uses, application by application.
Downrigger fishing for example requires a line that is abrasion
resistant, functions well with various line releases, has
good knot strength and a controlled amount of stretch. Hands
down, nylon monofilament is the top choice among serious
downrigger fishermen.
Because line diameter plays a minor roll in this deep water
fishing style, select a line that is plenty heavy for the
job. For most downrigger fishing a quality 17 or 20 pound
test line works best. While this line is heavier than necessary
for many species, there is practical value in using one
heavier line for a multitude of species.
DUAL BOARD PLANER FISHING
Anglers who fish dual planer boards routinely fish with
three, four, five or even six lines per side! The shear
cost of loading all these reels with fresh line almost mandates
the use of monofilament line. Despite the cost benefits
of monofilament, this line type is the obvious choice for
fishing planer boards because it offers controlled stretch,
it functions well with most line releases, is relatively
thin in diameter, knot strength is excellent and monofilament
can stand up to the abrasion issues of using line releases
over and over again.
For smaller species like walleye or brown trout a quality
10 pound test line is ideal. Fished in combination with
OR10, OR14 and OR3 line releases are recommended. For larger
species like trout and salmon, bumping up to 17 pound test
is recommended and also using OR19 or OR3 line releases.
IN-LINE BOARD TROLLING
Like dual boards, in-line board fishing is another job
for nylon monofilaments. Smaller species are easily handled
with 10 pound test and 17 pound test is the best choice
for steelhead, salmon or trout fishing. The ideal line release
for walleye is the OR16 Snap Weight Clip and for salmon
and steelhead the OR19 works great.
A growing number of anglers are using spectra braid or
fused lines in combination with in-line boards. The primary
reason these ultra thin lines are selected is to allow crankbaits
and other lures to achieve maximum depth.
When these low stretch lines are used on in-line boards,
special line clips must be employed that are designed to
hold these thin and slick lines. The Off Shore Tackle Snapper
(OR18) has emerged as the best line clip for fishing these
lines. The cam style jaw can be adjusted to hold these thin
lines securely, eliminating the problem of the line popping
free from the board.
TROLLING DIVERS
Full sized diving planers like the popular Dipsy or newer
products including the Slide-Diver and Walker Diver can
be fished on a number of lines effectively. Monofilament
in the 25-30 pound test range has always been the standard
for diver fishing, but the stretch in monofilament makes
it difficult to trip a diver when a long lead is deployed.
More and more anglers are discovering that the spectra
braids are the ideal line for fishing divers. A 30# test
spectra braid has a diameter equal to about eight pound
test monofilament! This extra thin diameter allows divers
to reach substantially deeper depths, increasing their versatility.
Fused lines can be used for diver fishing as well, but
spectra braids are more abrasion resistant and stand up
better with hard use.
Stranded stainless steel wire can also be used to deploy
divers. Wire runs slightly deeper than spectra braids because
the cumulative weight of the line helps to add a modest
amount of extra depth.
Unfortunately fishing stainless line requires rods with
roller guides. Stainless line must also be let out carefully
to avoid backlashes that are nearly impossible to pick out
with stainless wire.
A spectra braid in 30 or 40 pound test is the best compromise
when selecting lines for fishing divers.
MINI DIVERS
Mini divers have become very popular for anglers who troll
spoons or harnesses for walleye. Like their bigger brothers
designed for deep water trout and salmon fishing, mini divers
can be used to fish a wide range of depths.
Because mini divers are most often used in combination
with planer boards, monofilament line is the top choice
for fishing these trolling aids. For walleye and other smaller
species 10 pound test is the top choice and for trout and
salmon 17 pound test works well.
BOTTOM BOUNCERS
Walleye anglers spend a lot of time slow trolling bottom
bouncers along sprawling flats. This timeless angling technique
functions best with monofilament lines when fishing in water
from 10-20 feet deep. A quality 10 pound test is the top
choice of most serious walleye anglers.
When fishing bottom bouncers in deeper water, super thin
spectra braids make a lot of sense. The ultra thin diameter
of these lines makes it easier to maintain occasional contact
with the bottom. A 15 pound test spectra braid has a diameter
of about six pound test monofilament.
LEADERS FOR HARNESSES, DIVERS, ETC.
Fluorocarbon is the best possible line for all leader chores.
Tougher than monofilament and virtually invisible in water,
fluorocarbon is the top choice for tying walleye rigs, diver
leaders, trout/salmon flies and other in-line leaders. Because
fluorocarbon lines are so difficult to see in the water,
it makes sense to use a slightly heavier line when tying
leaders than would ordinarily be used.
A spool of 17 pound test fluorocarbon leader material is
ideal for fishing walleye, trout, salmon and other species.
Fluorocarbon lines are not just sold in leader spools. You
can buy filler spools and use fluorocarbon as the main line.
Cost is the primary disadvantage in using fluorocarbon as
a main line. Because of the abrasion resistance of fluorocarbon,
these lines are also stiff and they do not manage well on
a reel spool.
SPECIAL TROLLING PURPOSES
Both lead core and copper wire are special purpose trolling
lines designed to reach deep water fish. Both are fished
the same way, essentially letting out large amounts of these
sinking lines to achieve the desired depth. A leader is
used at the terminal end and backing of monofilament or
sprectra braid used at the back end.
Lead core line is somewhat less expensive and a little
easier to work with in terms of loading it onto reels and
letting out line while fishing.
Copper is heavier and fishes deeper with less line out
making it more practical for fishing in heavy traffic. However,
copper must be handled carefully to insure the line does
not get kinked. Once the line has been kinked or snarled
it is almost impossible to salvage the line.
The most popular size of lead core is 27 pound test and
for copper wire trolling the 45 pound is considered the
most popular.
SUMMING IT UP
Hopefully this helps clear up the murky waters surrounding
fishing lines. Monofilament is still the best choice for
a multitude of trolling chores, but some of the special
purpose lines are carving out more important niches every
year. The key is to be versatile and use each line for the
purpose it functions best.
<Back to Top |
